Showing posts with label weber smokey mountain. Show all posts

Friday, May 11, 2018

Converting My WSM to a Charcoal Grill for Steak Kabobs

A few weeks ago I was smoking a slab of ribs to try out a new recipe, not intending for ribs to be our dinner. And my wife decided we should have steak kabobs. Given I had the WSM fired up, I decided to take a shot at turning it into a standard Weber kettle charcoal grill to cook the kabobs. Turns out, it was very easy to do, and was a nice improvement on taste from my usual Weber gas grilling.

Only Using the Bottom Bowl

As anyone familiar with a WSM knows, it comes in 3 pieces. There's the bottom bowl, where the charcoal sits. The middle section which holds the water pan and 2 racks. And then the top piece, which is the lid. 

For this exercise, I just got rid of the middle section and placed the top grate directly on top of the bottom bowl, with the charcoal just below it as usual.

2-zone Grilling Setup

2-zone Setup with the Rack on Top

I lit a new chimney of charcoal to get some really hot coals. I then put them on the usual bottom charcoal rack, but all on one side. This was so I could have a 2-zone grill such that the side of the rack that sits directly over the charcoal is very hot, and the opposite side of the rack away from the charcoal isn't getting direct fire.

Closed with the Lid on Top

I then put the lid of the smoker on top of it to close everything off so it could get really hot, given steaks need the grill to pretty much be as hot as possible for a nice sear. To help it get hot, I made sure that all of the vents were open so the air flow would be pouring through and keeping the coals going.

Note that while this setup works well, there is no natural groove for the lid to sit on the bottom bowl (since it's not technically meant to do this), so you just want to be careful you don't bump it or it could easily slide off and fall.

Steak Kabobs on the "Grill"

After letting the grill sit with the hot coals and lid on top for a while, I decided the grill was hot enough to cook my kabobs. I wasn't exactly sure how hot it was (I didn't use my usual grill thermometer and didn't trust the built-in thermometer given the way it was setup), but I started with my kabobs directly over the coals. Not an important part of this post, but I was cooking steak-house marinade kabobs pre-made at Whole Foods.

When I'm cooking on my gas grill that I know so well, I would usually give these kabobs about 4 min on a side, then flip for another 4 min, and then 1 min each on the sides that hadn't touched the grill yet. This is to come away with them cooked medium rare. I decided to follow that approach on this and see if it was cooking too fast or too slow using my Thermapen meant thermometer.

In this case, it turned out that they needed to cook for closer to 15 minutes as opposed to my usual 9-10 minutes. Not a huge difference, but clearly it wasn't as hot as my gas grill is. This can be fixed next time by allowing the hot coals to stack higher, closer to the grate, as opposed to having them really flattened out as I did this time around to be careful.

However, I will say at the end of cooking, the outside of the kabobs was getting a nice char, and to prevent it from getting too much more, I moved the kabobs to the indirect heat side for the final 5 minutes, and that seemed to work really well (this is what you can see in the above picture).

Finished Product - Steak Kabobs on a WSM

The kabobs ended up being cooked perfectly medium rare, and had a really nice traditional charcoal grill flavor to them. I considered this a nice upgrade over my usual gas grill. So I will definitely utilize this technique going forward. It takes more time and effort relative to my convenient gas grill, so this probably won't be a regular occurrence, but it's definitely going to be worth it on occasion to mix it up.

Thursday, November 16, 2017

Smoked Turkey (Thanksgiving Preview)

SMOKING RECIPE CLIFF NOTES:
- Clean out turkey insides and trim fat
- Inject the turkey with a light salt brine
- Make the salt-free rub and mix with some water to make a wet rub
- Cover the turkey in melted butter
- Spread the wet rub all over the turkey
- Put the turkey on the smoker at 325F until the breast meat hits 160F (~13 min/lb)
- Pull the turkey, carve it up, and serve

Next week is Thanksgiving, and for the first time, we are hosting some family. And so that means, I am in charge of cooking the turkey. So naturally, I decided I'm going to smoke it.

Having never done this before, I decided that I better do a trial run on it. While I plan to get a natural/unfrozen 14-15lb turkey for the main event, I did my practice run with an 11lb frozen (already injected, more to follow on this) butterball.

11lb thawed butterball turkey

Because the turkey was frozen, I had to buy it a few days in advance to give it plenty of time to thaw out in the fridge. I got it three days ahead of when I planned to cook it, and it's a good thing, because when I pulled it out to get started, it was still ever so slightly still frozen. But good enough to move forward. I put it in some cold water in a bowl to do the final thawing out as I got my smoker going.

For this cook, I wanted my Weber Smokey Mountain to average around 325F. Unlike my other big meats such as brisket or pork shoulder, the higher temp helps the turkey cook faster but more importantly, helps the skin get crispier. To fire up my smoker, I went with a full chimney of lit charcoal, and once they were in the base, I added half a chimney of unlit charcoal on top of it. When the turkey goes on, I popped in a few chunks of apple wood.

Cleaned out turkey

Once the smoker was lit and the turkey was completely thawed, I started "cleaning" it. To do this, I simply removed everything from the inner cavities and saved these for the drip pan (except for the liver which I threw away). I then trimmed any excess fat around the openings. And I untied the legs to let them cook openly.

Now there's lots of talk about brining poultry, including a turkey. If mine had not been injected with a salt solution at the factory (such as when I cook it on actual Thanksgiving), I will definitely do a brine to help the meat retain moisture. But since this had already been filled, I decided that I would instead inject the turkey with a brine just before I put it on the smoker. The injection was 4 cups of water, 2tbsps salt, and 1tbsp of sugar. Then I made my rub to go all over the turkey.

Dry rub prepared to go on the turkey

As always, credit to Amazing Ribs where I always start on my smoking research for anything new. There I got the recipe for this salt-free rub that seemed like it would go very well with turkey. It had a whole list of herbs, and you can find the specific recipe here.

Once the rub was ready, I put some in a bowl and added water to it to make a wet rub. Before I started putting it all over the turkey, I melted some butter and rubbed that all over it. That may have been liquid over-kill on the outside of the bird, but I figured who doesn't like a little extra butter on pretty much anything? Plus, butter helps the skin crisp up while it's smoking.

Put the wet rub all over the turkey

Rubbed up turkey from the front

Rubbed up turkey from the back

After rubbing the butter all over the turkey, I then put the wet rub all over, on both the outside and underneath the skin where I could. The turkey skin is pretty thick so it's actually easy to force your hands underneath it to really get the rub everywhere.

Drip pan to make thin gravy

The last thing to do before putting the turkey on the smoker was the get the drip pan ready. As mentioned earlier, I had already put the insides of the turkey, as well as the turkey neck, in the pan. I then added quartered onions, celery, carrots, and some of the dry rub. And then filled it nearly to the top with water. Not only would this collect the drippings from the turkey, but the water will help add moisture to the smoker, in place of my usual water bowl.

Turkey on the smoker

And with that, the turkey was ready to go on the smoker. I put the drip pan on the lower rack, as you can see in the picture above. And then the turkey went on top with the meat thermometer plugged into the thigh, because it's the thickest/meatiest part of the bird.

And then, we wait. This was a low maintenance smoking session so there wasn't much for me to do but make sure the smoker temp stayed around 325F. My plan was to pull the turkey when it got to 160F in the breasts, as that would mean the legs/thighs are probably closer to 170F. My expectations were for an 11lb turkey to take about 2.5-3 hours to cook.

Finished product - smoked turkey!

Smoked turkey from a different angle

And one more angle - from the back

Drip pan filled with the "thin gravy"

Carved up turkey - let's eat!

Sure enough, after almost exactly 2.5 hours, the turkey was ready to be pulled. The meat thermometer was only reading 152F - short of my 160F target - but when I went and checked it with my thermopen, I saw a number of 170F+ readings. I was actually worried that I had over cooked it, but that wasn't the case.

I pulled the drip pan out and poured the contents through a strainer so just the liquid "thin gravy" would be saved. This was used as an add-on to the turkey, not as much in a traditional gravy sense, but more as an au jus to complement the meat. I think it was pretty water-y, a bit too much for my liking, but it would be very helpful if the meat is a little too dry.

I carved up the turkey right away, as there really was no reason for it to sit around. And you can see from the last picture above the final display. I carved up one each of a drumstick, leg, and thigh, and left one of each un-carved. I then carved up the breasts completely.

I think everything tasted pretty good. The moisture was excellent - the meat was very juicy - so I was happy with my limited brining decision. Plus, it wasn't too salty which was another thing I worried about with brining. The only thing I didn't love was I had too much of the rub on the breasts. It was an overpowering flavor on the part of the meat. When I do it again for Thanksgiving, I'm going to go a little lighter on how much I put on the turkey. Otherwise, everything was great. 

SMOKING RECIPE CLIFF NOTES:
- Clean out turkey insides and trim fat
- Inject the turkey with a light salt brine
- Make the salt-free rub and mix with some water to make a wet rub
- Cover the turkey in melted butter
- Spread the wet rub all over the turkey
- Put the turkey on the smoker at 325F until the breast meat hits 160F (~13 min/lb)
- Pull the turkey, carve it up, and serve


Monday, June 26, 2017

Smoked Almonds

SMOKING RECIPE CLIFF NOTES:
- Soak raw almonds in water for 10 minutes
- Remove almonds from water and cover in rub
- Put the almonds on the smoker at 225F
- Let them smoke for 1-1.5 hours, stirring/flipping the almonds half-way through
- Remove the almonds from the smoker and allow them to cool for 15 minutes before serving

Two weekends ago, I decided I wanted to try something entirely new on the smoker. And I also didn't want to spend all day doing it. So I decided to give smoked almonds a try.

I started off with my usual recipe research, and when I came across this post from my usual favorite site, I realized that I could be a little flexible and creative with my approach without there being much issue.

So I went to Costco and bought a huge package of raw almonds. I started off by getting my smoker going, and knowing I didn't need to cook for very long, I went light on the number of coals I lit. I got my smoker running around 225F and then got to preparing the almonds (warning: pictures aren't particular exciting for this post).

Almonds soaking in water

Almonds ready to go on the smoker

The first step in prepping the almonds was to let them soak for 10-15 minutes in water. This just helps them soften up to take on the smoke, while decreasing the chances of them getting burned.

I then pulled them out and through them in smoker safe pans. I had to split them up because of the size of my smoker, and I was going to try to two different recipes. The picture on the left shows the almonds that I rubbed up with some Plowboys Yardbird rub. The picture on the right shows the almonds that I simply covered with salt & pepper.

Almonds on both racks of the smoker

After that, I put both pans of almonds on the smoker, on separate shelves just because they fit better. Again, I had the smoker running around 225F.

Now I had read some recipes that said to let them cook for 30 minutes, and others that said to let them go for 2-3 hours. Given we had some errands to run, I decided to go with the longer time frame to let them get more smoke.

The only thing I had to do in the middle of the cooking was give them a little stir to flip them around so they weren't just sitting on one side the entire time.

Almonds fresh off the smoker

I left the almonds on for about 1.5 hours all-in. When I pulled them off, I then let them sit for about 15 minutes before trying them, so they would cool off and harden a bit.

Upon eating them, there was a clear favorite. The almonds I had covered with actual rub were really good. Great smoky flavor, with enough seasoning from the rub to give them a great taste. The plain salt & pepper covered almonds weren't bad, but compared to the others, they were really lacking.

So the lesson was to use rub! But this was a really easy and tasty snack, and I plan to do more soon and just create a big batch to have around.

SMOKING RECIPE CLIFF NOTES:
- Soak raw almonds in water for 10 minutes
- Remove almonds from water and cover in rub
- Put the almonds on the smoker at 225F
- Let them smoke for 1-1.5 hours, stirring/flipping the almonds half-way through
- Remove the almonds from the smoker and allow them to cool for 15 minutes before serving

Monday, March 20, 2017

Competition-Style Chicken Thighs

SMOKING RECIPE CLIFF NOTES:
- Trim bone-in, skin-in chicken thighs, removing as much fat as possible and making them all look similar
- Make a brine of water, apple juice, sprite, salt, pepper, brown sugar. Submerge thighs in it for 2 hours in fridge.
- Remove thighs from brine, rinse with cold water, and put the rub all over including underneath the skin
- Place each thigh on top of butter in a foil pan for butter bath, and place on the smoker at 275F
- After an hour, remove thighs from butter bath and place directly on smoker
- After another 30-60 minutes, when the internal meat temp hits 165/170F, pull from smoker
- Cover thighs in BBQ sauce and place back on smoker at 300F to caramelize
- After 15-30 minutes, remove from the smoker and serve

I'm now 3 years into my obsession with smoking meats/BBQ, and have yet to try out chicken thighs. Why, you may ask, would I avoid them? Especially considering they are a main part of competition BBQ? Well, I have no idea. But this past weekend, I decided that needed to come to an end.

I cook chicken on the grill regularly, and we all really enjoy it. Maybe because it's so easy to do that, I've always favored that approach. But after this weekend's attempt, I realize (duh!) just how much better they are when smoked.

I decided to approach this as I would a competition, which is why I titled this post "competition-style chicken thighs". There are some parts of this recipe that are a waste of time for backyard BBQ. But it always feels more fun to take it too seriously anyway. So, without further adieu...

I bought a pack of 10 bone-in, skin-on chicken thighs from my local grocery store. Nothing special. I brought them home and although I wasn't going to cook them until the next day, I decided to clean and trim them in advance.

To do this, I peeled back the skins and trimmed away any excess fat. I also used a small knife and scraped away some fat on the underside of the skin. This supposedly helps make the skin thinner and easier to bite through - a key component of competition judging. It didn't work for me, but I'll get into that later. I also cut off any pieces of meat that were sticking out, in an effort to make all the pieces look as similar as possible. Once I finished, I put them all in a container and into the fridge for the next day's cook. Then I watched hours of the NCAA tournament, including a disappointing upset of my Fighting Irish. At least I had BBQ to look forward to!

The next day around 12:30pm I decided to get a brine ready to put my chicken in for a few hours prior to cooking. My brine recipe was really simple with approximate amounts: 1 cup of water, 1 cup of apple juice, 1 can of Sprite, 1/4 cup of kosher salt, 2tsps black pepper, 2tsps brown sugar. I used less salt than a typical brine may call for because my rub has salt in it and I'm constantly worried about over-salting poultry when I brine it. Anyway, mixed it all together, poured it all over the chicken, and placed back in the fridge.

About 2 hours later, around 2:30pm, I pulled the chicken from the brine and rinsed each piece off in cold water. I then put it back into the fridge.

Chicken thighs post brine

You can see I didn't do an A+ job with my skins staying wrapped around the chickens. The best competition cooks put a lot more effort into this, making sure the skin wraps all the way around, using toothpicks (or other materials) to keep it together throughout the entire cook, etc. I didn't want to spend that much time on it. And the thighs looked uniform enough for my liking.

I wanted to get the chicken on the smoker around 4pm, anticipating a 1.5-2hour cook. So around 3pm I got the smoker lit, utilizing a smaller than usual minion method with more lit coals to start. I also did not fill the water pan. I wanted the smoker to run hot, aiming for a 275-300F for cooking.

I then pulled the chicken thighs from the fridge and started rubbing them up. I used Plowboys Yardbird Rub, and made sure to get all over the thighs. This included peeling the skin back once again, and rubbing the meat underneath it, and then putting the skin back on top and rubbing on top of it. Once again, I wanted to make sure not to overdue the rub for fear of making it taste too salty.

Plowboys Yardbird Rub

Rubbed up chicken thighs

I decided to start the cook with the chicken in a butter bath. Many cooks use this approach to add some flavor (who doesn't like butter on their food?) but also it's supposed to help with the texture of the skin. I'm not sure I needed it for backyard BBQ, but I decided to go with it anyway. I used one stick of butter cut into 10 pieces to lay each thigh on top of, skin-side up, and then cut up another stick of butter to sit on top of the chicken. Paula Deen would be proud! I then put the pan on the smoker around 4pm at 275F, and added 4 hickory wood chunks (I would have preferred apple wood but didn't have any on hand).

Butter in the foil pan to place thighs on top

Rubbed up thighs in the foil pan with butter on top ready to go on smoker
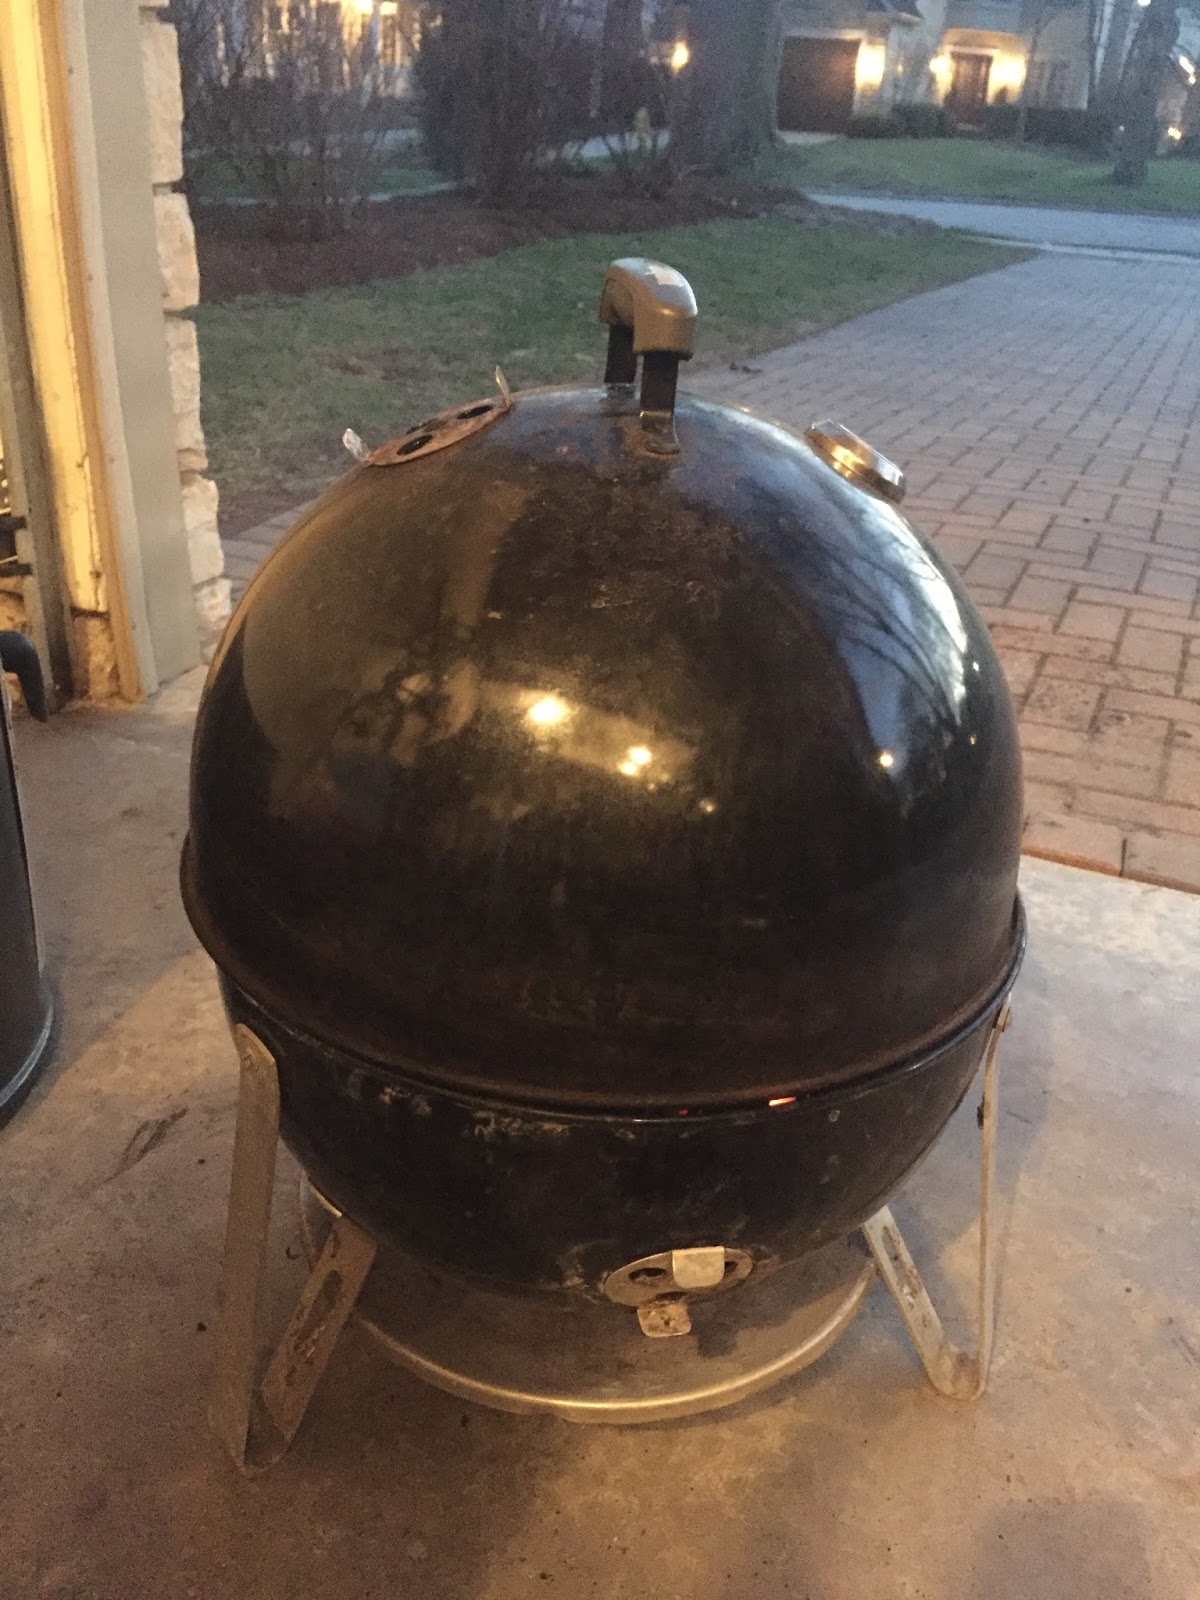
Standard WSM shot!

After about an hour, around 5pm, the chicken was ready to leave the butter bath and go directly on the smoker. I should note, the butter bath came up about half-way on the chicken. I read that you do not want to have the thighs submerged in butter. Anyway, I pulled each thigh out of the bath and put directly on the smoker. I then drizzled a little honey on top of each thigh to add a little extra sweetness. Again, I kept the smoker temp around 275F.

Chicken thighs pulled from butter bath and placed directly on the smoker

At this point, I decided to heat up some BBQ sauce. I used Plowboys as well (coincidentally, I promise I wasn't being sponsored by them - though I'm open to it if they're reading this?), and I added some honey to it to make it a little sweeter. I cooked it on the stove with the hopes of thinning it out a bit. I read I could have added some Coke to it also, but I didn't have any and am not sure I really needed it. I let that sit on the side waiting for the chicken to be ready for it.

After about 30 minutes, I started checking the internal temperature of the thighs. My target was for 165-170F. At that point, they were all running a little cooler around 150F, so I left them on a bit longer. After another 15 minutes (5:45pm), I checked once again and had hit the target. So I pulled them off and brought them inside to sauce them.

I typically aim for little to no sauce on my BBQ, but I wanted to try making the sauce a bigger part of the chicken. So I dipped each thigh in the sauce pan, completely submerging them. It worked out great for taste, but in hindsight, it was over-sauced. I'll do it lighter next time, brushing sauce on like I do with my ribs. I added a small sprinkle of brown sugar on each piece as well to give them more sweetness, and I then put the sauced chicken back on the smoker at 300F to finish them and caramelize the sauce a bit. I left them on for about 20 minutes, and then pulled the finished product.

Chicken thighs hitting the 165-170F mark, ready to be sauced

Finished product - (over-sauced) chicken thighs

In the end, the taste of these thighs was really really good. I underestimated just how much value the smoke brings to the table (vs my standard grilling). There was a slight bite to the chicken, I guess because of the rub, and the sweetness I added was really great. The meat was also extremely juicy, which was thanks to a combo of the brine and being on top of the meat's internal temperature.

A lot of the preparation effort I put into this was to make it such that when someone bites into the thigh, they bite right through the skin. As opposed to pulling it all off. Also, it's in an effort to make the skin crispy. Well, save a few exceptions, my skin was definitely not crispy, and slid right off with the first bite. So that's something for me to work on for a competition. 

But fortunately, it has no bearing on people's enjoyment! This is a definite keeper and I won't wait as long until the next time I do chicken thighs on my smoker - definitely going into the regular rotation!


SMOKING RECIPE CLIFF NOTES:
- Trim bone-in, skin-in chicken thighs, removing as much fat as possible and making them all look similar
- Make a brine of water, apple juice, sprite, salt, pepper, brown sugar. Submerge thighs in it for 2 hours in fridge.
- Remove thighs from brine, rinse with cold water, and put the rub all over including underneath the skin
- Place each thigh on top of butter in a foil pan for butter bath, and place on the smoker at 275F
- After an hour, remove thighs from butter bath and place directly on smoker
- After another 30-60 minutes, when the internal meat temp hits 165/170F, pull from smoker
- Cover thighs in BBQ sauce and place back on smoker at 300F to caramelize
- After 15-30 minutes, remove from the smoker and serve

Monday, August 17, 2015

Straight to the Point: Burnt Ends August 2015


SMOKING RECIPE CLIFF NOTES:
Burnt Ends:
 - Trim a brisket point so there's about 1/4in of fat
 - Cover the point in rub, vacuum seal it, and place it in the fridge overnight
 - Set the smoker up using the minion method
 - Put the point on the smoker in the 225-250 degree F range until the meat hits 195-203 degrees F
 - If it's taking too long, around 160 degrees, wrap the meat tightly in foil for the remainder of the time
 - After the meat hits 195-203 degrees F, let it sit for an hour, the chop it up into 1in cubes
 - Cover the cubes with more rub and bbq sauce, and put back on the smoker around 300 degrees F
 - Pull whenever your'e ready to eat (after at least an hour), and serve!

When the idea of BBQ is mentioned, most people immediately think of ribs and pulled pork, and maybe even sliced brisket. What's funny about that is that one of the tastiest BBQ items doesn't make this list: burnt ends. If you are one of those people who like BBQ but are unaware of what burnt ends are, then pay attention, and remember to try to order some next time you go to a BBQ restaurant - I am confident you won't regret it.

Because burnt ends are such a crowd pleaser, and a favorite of mine, I decided that I wanted to try to do a cook session in which they were my entire focus. No sliced brisket, no pork (ribs or pulled). Just burnt ends.

As I have previously mentioned when discussing cooking a full packer brisket, there are two portions that make up the large hunk of meat. First, you have the leaner brisket flat, which is what the more traditional sliced brisket comes from. Second, you have the fattier brisket point. This is the key portion used to make burnt ends. Unfortunately, most stores sell full packer briskets and/or brisket flats, but do not sell brisket points on their own. Since I wanted to try out focusing solely on cooking the brisket point, I decided to go to a local (and more expensive than my usual, Costco!) butcher to get the point. He thought I was crazy buying just the point, because it has so much fat on it, but that fat is the key to burnt ends, so I still waved it in. I planned to cook the meat on Sunday, which meant picking it up from the butcher and preparing it on Saturday.

Top of untrimmed brisket point

Bottom of untrimmed brisket point

Side-view of untrimmed brisket point

The first thing to point out from the pictures of the untrimmed brisket point above is all of the fat. The side-view picture really shows just how much I was working with initially. While the butcher offered to trim it for me, I turned that down so I could do it myself, knowing that I needed a good amount of fat on the meat while cooking. Plus, I kind of enjoy trimming fat off of meat - no idea why.

Top of trimmed brisket point

Bottom of trimmed brisket point

3.25lbs of trimmed fat!

This particular brisket point weighed about 7.75lbs untrimmed. After I was finished with all of my fat trimming, it weighed about 4.5lbs. That means I paid for about 3.25lbs of fat that I ended up throwing out, and that is exactly why the butcher thought I was crazy. But it's what I wanted to do this time around for cooking solely burnt ends for the first time.

The pictures above show the point after I trimmed it. In general, I was trying to keep about 1/4in of fat throughout most of the point, though you can see sometimes I cut all the way down to the meat. You can also see that I made some cross-hatch type slices through the top of the fat where I could - this is just so the rub would penetrate the meat more effectively.

Plowboys Bovine Bold rub

Top of rubbed brisket point

Bottom of rubbed brisket point

Rubbed and vacuum sealed brisket point

Once the point was trimmed, came time to put the rub on it. The rub I chose to use for these burnt ends was the Plowboys Bovine Bold, which is perfect for brisket - it isn't too sweet (which I like on pork) and has a nice amount of heat.

I covered the entire piece of meat with some oil (think it was olive oil?), so the rub would stick better. And then just generously covered the entire point, getting it in every crease I could find. Pictures 2 and 3 above show both sides of the point covered in rub. Lastly, I vacuum sealed the rubbed point, and placed it in the fridge. This was at about 6pm on Saturday, and I planned to start cooking it Sunday at 10:30am or so. As usual the case, there is no rule about how far in advance you want to prepare the meat and put it in the fridge, but I generally try to get at least 12 hours.

Brisket point pulled from vacuum sealed wrap

Brisket point re-rubbed prior to going on smoker


Sunday morning around 10am I pulled the meat from the fridge. I cut it out of the vacuum sealed wrapping, and you can see what it looked like above in the first picture - it kind of looks like the rub penetrated the meat and was just a wettish goop on the surface. Therefore, I re-rubbed it, just pouring more all over the meat. I then put it aside to let it sit at room temperature until it was ready to go on the smoker.

When that was finished, I got the smoker set up for cooking. As usual for longer cooking sessions, I used the minion method, filled the water-pan with very hot water, and got the smoker temperature running within my target range of 225-250 degrees F. By 10:30am, the smoker's temp was around 240 degrees F, and so I put the point on the top grate. At this point, I added two chunks of hickory wood to get the smoke going so the meat could start absorbing it. My target meat temperature, which is the same as when cooking a full brisket, was between 195-203 degrees F. Given I was smoking 4.5lbs of meat and it usually takes about 1-1.5 hours per pound, I expected to take around 7 hours to hit that meat temperature target.

One hour into the smoking

Four hours into the smoking

Five and a half hours into the smoking

After the point had been on the smoker for around an hour, I added another chunk of hickory wood to keep the smoke going strongly. I also took a picture which can be seen above at the top.  Once again, I added another chunk of hickory after yet another hour of smoke time. This is the last time I added wood because I don't want to overdue it (too much smoke gives meat a bitter flavor), and after the meat's temp his around 140 degrees, the smoke doesn't really stick to the meat anymore anyways. You can also see the foil pan below the meat. I did this to catch all the drippings, as I planned to use them in the later stages of making the burnt ends.

After four hours of smoking, as can be seen in the second picture above, I opened up the smoker and sprayed the point with some a mixture of 3 parts apple juice and 1 part oil. I did this again after another hour of cooking as well. Then, after the meat had been on the smoker for 5.5 hours and was measuring an internal temp of 165 degrees F, I pulled it and wrapped it tightly in foil. This is because of the "stall", which is when the meat's temperature doesn't move much between 150-170 degrees F. It's very frustrating - as I've mentioned in previous posts - and when you're trying to stick to a schedule, sometimes you just need to keep things moving. After wrapping it, I through it right back on the smoker, and left it there until hitting 201 degrees F. It had been on the smoker for 7.25 hours. At that point, I removed the foil-wrapped meat from the smoker, wrapped it in a towel, and put it in a cooler to let it rest for an hour or so.

Fully-cooked brisket point

Brisket point removed from the foil

Started slicing the point - and snacking on a few amazingly delicious pieces

Brisket point cut into roughly 1in cubes

Brisket point cubes placed in foil pan

After letting the cooked brisket sit in the cooler for an hour, it was time to cut it into 1in cubes. You can see when I first opened the foil and pulled the meat out (pictures 1 and 2 above), the meat looks kind of wet and soggy, as opposed to having that more typical dark bark that the smoke and rub combination makes. This is not intentional on my part as I'd rather have the bark, but it's almost impossible to avoid when you wrap meat in foil. Given I'm making burnt ends here, and they're about to go back on the smoker, I figured it didn't matter in this case.

As mentioned, I cut the point up into 1in cubes and placed them in a foil pan. I also ate a couple while doing this, because it was way to hard not to do so. The meat is just so tender and juicy and flavorful. But, it's not finished yet!

Re-rubbed brisket point cubes

Brisket point cubes covered in bbq sauce mixture

KC's own Cowtown BBQ sauce

The BBQ sauce mixture

When the 1in cubes were placed in the pan, I then gave them a light dusting of the same rub used all along. This is just because the pieces are going to go back on the smoker, and I want to extra rub to help add more flavor. I then brushed each cube with a BBQ sauce mixture, which was a combination of the drippings from the pan I had in the smoker, the meat juice (aka au jus) that was contained with into the foil when I wrapped the point, and some Cowtown BBQ sauce - which is the commercial version of Kansas City's famous Joe's Kansas City (aka Oklahoma Joe's) restaurant. 

After all of that, the cubes are ready to go back on the smoker. To help give the meat a bit of a harder crust, I stoked the fire in the smoker to help bring the temperature up to around 300 degrees F - thus, we call them "burnt ends" (actually, that's not technically why we call them burnt ends, but I digress). 


Cubed burnt ends back on the smoker
Close-up on the smoker

Burnt ends pulled from the smoker and finished

Burnt ends - up close and personal

There is no real set time that the cubed burnt ends are supposed to go back on the smoker, nor am I looking for them to hit a certain internal temperature as they are already cooked. The key is simply to let them get some heat (recall I pumped the smoker's temp up to 300 degrees F) so the rub and bbq sauce mixture can get a little burnt and harden up on the meat.

I chose to leave them on the smoker until about fifteen minutes before we wanted to eat dinner, so in all in all, they were back on there for about 1.5 hours. I think when I do it next time, I'll plan to leave more time for them to sit on there and get even more "burnt". But in any event, I pulled them and fifteen minutes later, we were eating. And just look at that last picture and tell me those don't look delicious!?!? Believe me, they were. 


SMOKING RECIPE CLIFF NOTES:
Burnt Ends:
 - Trim a brisket point so there's about 1/4in of fat
 - Cover the point in rub, vacuum seal it, and place it in the fridge overnight
 - Set the smoker up using the minion method
 - Put the point on the smoker in the 225-250 degree F range until the meat hits 195-203 degrees F
 - If it's taking too long, around 160 degrees, wrap the meat tightly in foil for the remainder of the time
 - After the meat hits 195-203 degrees F, let it sit for an hour, the chop it up into 1in cubes
 - Cover the cubes with more rub and bbq sauce, and put back on the smoker around 300 degrees F
 - Pull whenever your'e ready to eat (after at least an hour), and serve!