Monday, August 17, 2015

Straight to the Point: Burnt Ends August 2015


SMOKING RECIPE CLIFF NOTES:
Burnt Ends:
 - Trim a brisket point so there's about 1/4in of fat
 - Cover the point in rub, vacuum seal it, and place it in the fridge overnight
 - Set the smoker up using the minion method
 - Put the point on the smoker in the 225-250 degree F range until the meat hits 195-203 degrees F
 - If it's taking too long, around 160 degrees, wrap the meat tightly in foil for the remainder of the time
 - After the meat hits 195-203 degrees F, let it sit for an hour, the chop it up into 1in cubes
 - Cover the cubes with more rub and bbq sauce, and put back on the smoker around 300 degrees F
 - Pull whenever your'e ready to eat (after at least an hour), and serve!

When the idea of BBQ is mentioned, most people immediately think of ribs and pulled pork, and maybe even sliced brisket. What's funny about that is that one of the tastiest BBQ items doesn't make this list: burnt ends. If you are one of those people who like BBQ but are unaware of what burnt ends are, then pay attention, and remember to try to order some next time you go to a BBQ restaurant - I am confident you won't regret it.

Because burnt ends are such a crowd pleaser, and a favorite of mine, I decided that I wanted to try to do a cook session in which they were my entire focus. No sliced brisket, no pork (ribs or pulled). Just burnt ends.

As I have previously mentioned when discussing cooking a full packer brisket, there are two portions that make up the large hunk of meat. First, you have the leaner brisket flat, which is what the more traditional sliced brisket comes from. Second, you have the fattier brisket point. This is the key portion used to make burnt ends. Unfortunately, most stores sell full packer briskets and/or brisket flats, but do not sell brisket points on their own. Since I wanted to try out focusing solely on cooking the brisket point, I decided to go to a local (and more expensive than my usual, Costco!) butcher to get the point. He thought I was crazy buying just the point, because it has so much fat on it, but that fat is the key to burnt ends, so I still waved it in. I planned to cook the meat on Sunday, which meant picking it up from the butcher and preparing it on Saturday.

Top of untrimmed brisket point

Bottom of untrimmed brisket point

Side-view of untrimmed brisket point

The first thing to point out from the pictures of the untrimmed brisket point above is all of the fat. The side-view picture really shows just how much I was working with initially. While the butcher offered to trim it for me, I turned that down so I could do it myself, knowing that I needed a good amount of fat on the meat while cooking. Plus, I kind of enjoy trimming fat off of meat - no idea why.

Top of trimmed brisket point

Bottom of trimmed brisket point

3.25lbs of trimmed fat!

This particular brisket point weighed about 7.75lbs untrimmed. After I was finished with all of my fat trimming, it weighed about 4.5lbs. That means I paid for about 3.25lbs of fat that I ended up throwing out, and that is exactly why the butcher thought I was crazy. But it's what I wanted to do this time around for cooking solely burnt ends for the first time.

The pictures above show the point after I trimmed it. In general, I was trying to keep about 1/4in of fat throughout most of the point, though you can see sometimes I cut all the way down to the meat. You can also see that I made some cross-hatch type slices through the top of the fat where I could - this is just so the rub would penetrate the meat more effectively.

Plowboys Bovine Bold rub

Top of rubbed brisket point

Bottom of rubbed brisket point

Rubbed and vacuum sealed brisket point

Once the point was trimmed, came time to put the rub on it. The rub I chose to use for these burnt ends was the Plowboys Bovine Bold, which is perfect for brisket - it isn't too sweet (which I like on pork) and has a nice amount of heat.

I covered the entire piece of meat with some oil (think it was olive oil?), so the rub would stick better. And then just generously covered the entire point, getting it in every crease I could find. Pictures 2 and 3 above show both sides of the point covered in rub. Lastly, I vacuum sealed the rubbed point, and placed it in the fridge. This was at about 6pm on Saturday, and I planned to start cooking it Sunday at 10:30am or so. As usual the case, there is no rule about how far in advance you want to prepare the meat and put it in the fridge, but I generally try to get at least 12 hours.

Brisket point pulled from vacuum sealed wrap

Brisket point re-rubbed prior to going on smoker


Sunday morning around 10am I pulled the meat from the fridge. I cut it out of the vacuum sealed wrapping, and you can see what it looked like above in the first picture - it kind of looks like the rub penetrated the meat and was just a wettish goop on the surface. Therefore, I re-rubbed it, just pouring more all over the meat. I then put it aside to let it sit at room temperature until it was ready to go on the smoker.

When that was finished, I got the smoker set up for cooking. As usual for longer cooking sessions, I used the minion method, filled the water-pan with very hot water, and got the smoker temperature running within my target range of 225-250 degrees F. By 10:30am, the smoker's temp was around 240 degrees F, and so I put the point on the top grate. At this point, I added two chunks of hickory wood to get the smoke going so the meat could start absorbing it. My target meat temperature, which is the same as when cooking a full brisket, was between 195-203 degrees F. Given I was smoking 4.5lbs of meat and it usually takes about 1-1.5 hours per pound, I expected to take around 7 hours to hit that meat temperature target.

One hour into the smoking

Four hours into the smoking

Five and a half hours into the smoking

After the point had been on the smoker for around an hour, I added another chunk of hickory wood to keep the smoke going strongly. I also took a picture which can be seen above at the top.  Once again, I added another chunk of hickory after yet another hour of smoke time. This is the last time I added wood because I don't want to overdue it (too much smoke gives meat a bitter flavor), and after the meat's temp his around 140 degrees, the smoke doesn't really stick to the meat anymore anyways. You can also see the foil pan below the meat. I did this to catch all the drippings, as I planned to use them in the later stages of making the burnt ends.

After four hours of smoking, as can be seen in the second picture above, I opened up the smoker and sprayed the point with some a mixture of 3 parts apple juice and 1 part oil. I did this again after another hour of cooking as well. Then, after the meat had been on the smoker for 5.5 hours and was measuring an internal temp of 165 degrees F, I pulled it and wrapped it tightly in foil. This is because of the "stall", which is when the meat's temperature doesn't move much between 150-170 degrees F. It's very frustrating - as I've mentioned in previous posts - and when you're trying to stick to a schedule, sometimes you just need to keep things moving. After wrapping it, I through it right back on the smoker, and left it there until hitting 201 degrees F. It had been on the smoker for 7.25 hours. At that point, I removed the foil-wrapped meat from the smoker, wrapped it in a towel, and put it in a cooler to let it rest for an hour or so.

Fully-cooked brisket point

Brisket point removed from the foil

Started slicing the point - and snacking on a few amazingly delicious pieces

Brisket point cut into roughly 1in cubes

Brisket point cubes placed in foil pan

After letting the cooked brisket sit in the cooler for an hour, it was time to cut it into 1in cubes. You can see when I first opened the foil and pulled the meat out (pictures 1 and 2 above), the meat looks kind of wet and soggy, as opposed to having that more typical dark bark that the smoke and rub combination makes. This is not intentional on my part as I'd rather have the bark, but it's almost impossible to avoid when you wrap meat in foil. Given I'm making burnt ends here, and they're about to go back on the smoker, I figured it didn't matter in this case.

As mentioned, I cut the point up into 1in cubes and placed them in a foil pan. I also ate a couple while doing this, because it was way to hard not to do so. The meat is just so tender and juicy and flavorful. But, it's not finished yet!

Re-rubbed brisket point cubes

Brisket point cubes covered in bbq sauce mixture

KC's own Cowtown BBQ sauce

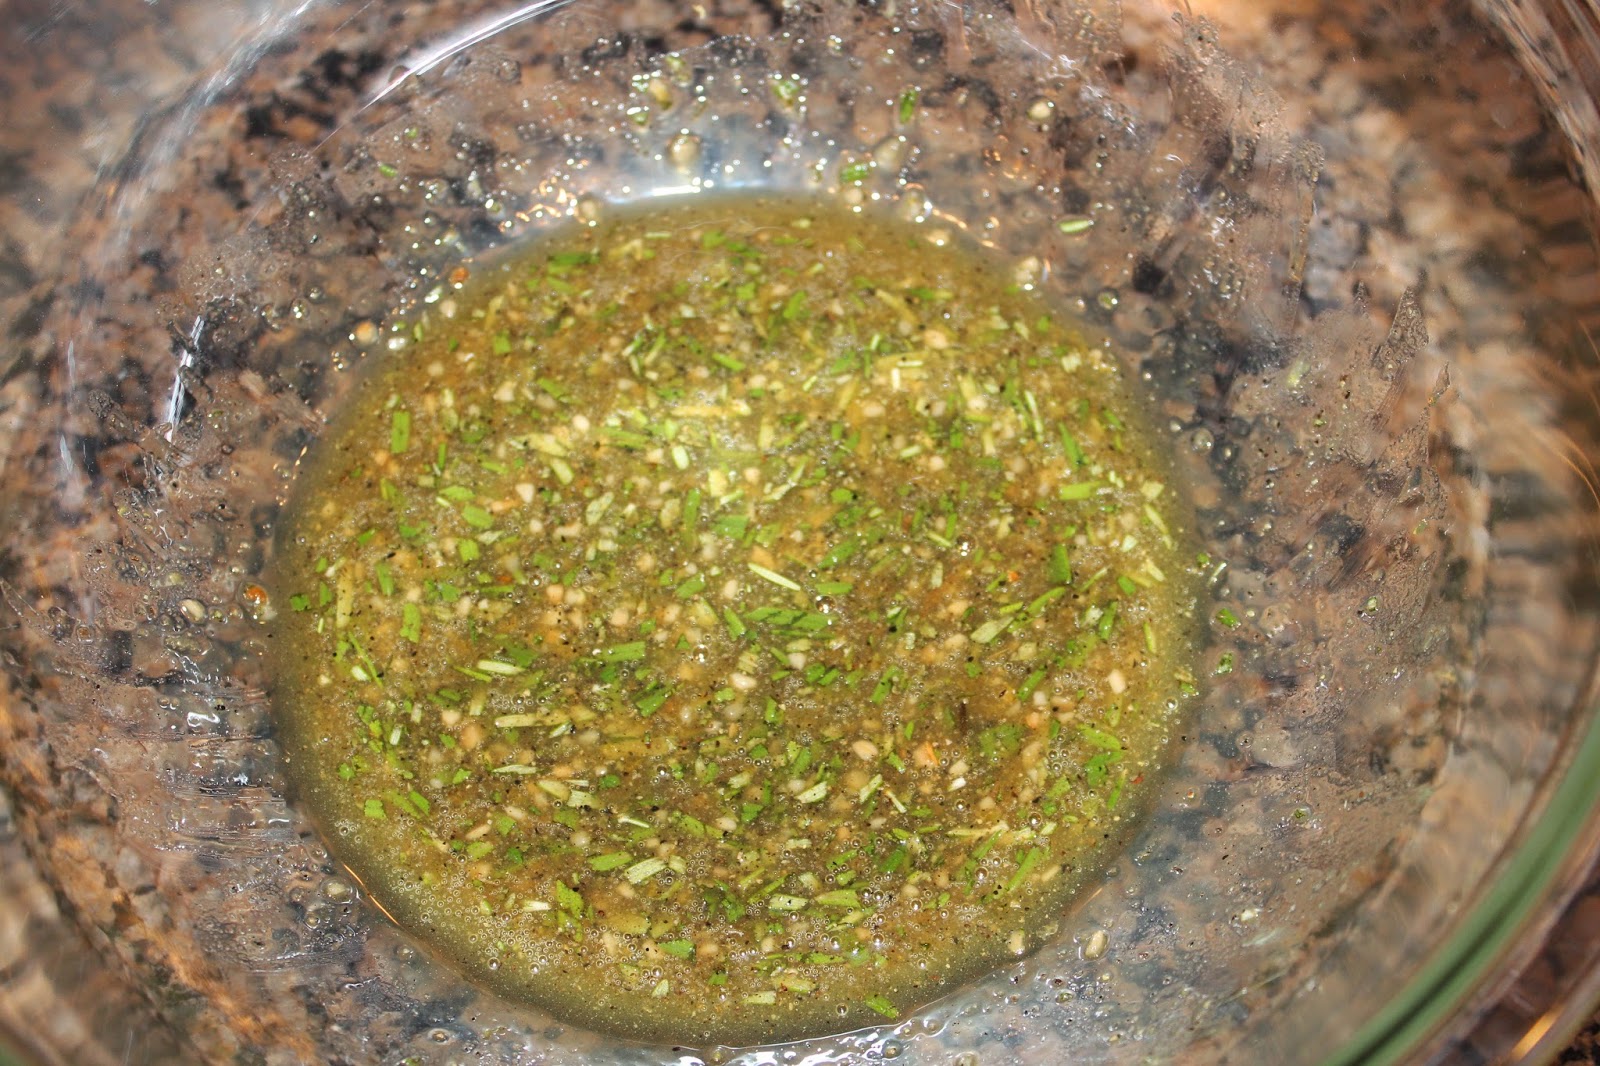
The BBQ sauce mixture

When the 1in cubes were placed in the pan, I then gave them a light dusting of the same rub used all along. This is just because the pieces are going to go back on the smoker, and I want to extra rub to help add more flavor. I then brushed each cube with a BBQ sauce mixture, which was a combination of the drippings from the pan I had in the smoker, the meat juice (aka au jus) that was contained with into the foil when I wrapped the point, and some Cowtown BBQ sauce - which is the commercial version of Kansas City's famous Joe's Kansas City (aka Oklahoma Joe's) restaurant. 

After all of that, the cubes are ready to go back on the smoker. To help give the meat a bit of a harder crust, I stoked the fire in the smoker to help bring the temperature up to around 300 degrees F - thus, we call them "burnt ends" (actually, that's not technically why we call them burnt ends, but I digress). 


Cubed burnt ends back on the smoker
Close-up on the smoker

Burnt ends pulled from the smoker and finished

Burnt ends - up close and personal

There is no real set time that the cubed burnt ends are supposed to go back on the smoker, nor am I looking for them to hit a certain internal temperature as they are already cooked. The key is simply to let them get some heat (recall I pumped the smoker's temp up to 300 degrees F) so the rub and bbq sauce mixture can get a little burnt and harden up on the meat.

I chose to leave them on the smoker until about fifteen minutes before we wanted to eat dinner, so in all in all, they were back on there for about 1.5 hours. I think when I do it next time, I'll plan to leave more time for them to sit on there and get even more "burnt". But in any event, I pulled them and fifteen minutes later, we were eating. And just look at that last picture and tell me those don't look delicious!?!? Believe me, they were. 


SMOKING RECIPE CLIFF NOTES:
Burnt Ends:
 - Trim a brisket point so there's about 1/4in of fat
 - Cover the point in rub, vacuum seal it, and place it in the fridge overnight
 - Set the smoker up using the minion method
 - Put the point on the smoker in the 225-250 degree F range until the meat hits 195-203 degrees F
 - If it's taking too long, around 160 degrees, wrap the meat tightly in foil for the remainder of the time
 - After the meat hits 195-203 degrees F, let it sit for an hour, the chop it up into 1in cubes
 - Cover the cubes with more rub and bbq sauce, and put back on the smoker around 300 degrees F
 - Pull whenever your'e ready to eat (after at least an hour), and serve!


Wednesday, June 17, 2015

Pork Shoulder May 2015

SMOKING RECIPE CLIFF NOTES:
Pork Shoulder:
- Trim excess fat off both sides of the shoulder
- Cover the shoulder in rub, wrap, and place in the fridge overnight
- Remove from fridge, tie-up and re-rub the shoulder, and then place on the smoker at 225 degrees
- Plan on 1-1.5 hours of cook time per pound of meat
- Add wood at the beginning, and occasionally spray with apple juice later on throughout the cook
- Remove from smoker when meat's internal temp hits 195 degrees
- Let it cool for at least 30 minutes, then chop or pull apart the meat, and serve!

This post comes with a bit of a delay, but as of about a month ago, Smoke Season has officially begun for me here in Chicago. I decided to kick the season off with a pork shoulder. Quick side note, this piece of meat is also referred to as a pork butt (among other names), but it has nothing to do with the pig's butt. Just fyi.

So moving on, time to smoke my pork shoulder with the plan to turn it into pulled pork sandwiches for a few people we had over to our house.

Two pork shoulders in one packaging

$30 for 16lbs of meat - not a bad deal

As usual, here are the shots of my meat after purchasing it. I went to Costco - no surprise there - and picked up their pork shoulder two-packs. I only needed one for this cook, so I freeze wrapped the second one and put in our freezer to save for later this summer. You can see that pork shoulder isn't that expensive. 16lbs of pork shoulder can make a lot of pulled pork!

Our friends were coming over on Saturday, so that meant Friday evening is when I did all my preparations for the cook.

Top of the 9lb pork shoulder pre-trim

Bottom of the pork shoulder pre-trim

Top of the pork shoulder post-trim

Bottom of the pork shoulder post-trim

The above pictures are both sides of the pork shoulder, before and after trimming the fat. The pork shoulder that I started with was approximately 9lbs, and by the time I was finished trimming, I had removed roughly 1.25lbs. This left me with a 7.75lb hunk of meat to go on the smoker.

When looking at the shoulder from the bottom (pictures #2 and #4), you can see a flap coming off on the bottom left. This is because the bone has been removed from this pork shoulder, so all of the meat doesn't necessarily stayed held together. Prior to go on the smoker, as you'll see later in this post, I tie the shoulder up to make sure it all stays together.

One other thing to point out, though hard to see in my pictures, is on the right side of the shoulder. There, you can see the area referred to as the "money muscle", which is considered to be the tastiest portion of the entire shoulder. In competition BBQ, this is typically the most popular piece to be sliced up and presented to the judges to really wow them.

After trimming and rinsing the shoulder, the next step was to apply the rub.

Pork shoulder with rub

Chicago's own "Lillie's Q" Carolina Dirt rub

Now typically I like to make my own rub, but over the past year, I have picked up a large variety of different commercially sold rubs. So I decided that I would try one out for this cook. After a blind taste-test with my wife, comprised of 6 different rubs (yes, we actually did this), we decided to go with one sold by a local Chicago BBQ restaurant, Lillie's Q. This particular rub was their Carolina Dirt, which had just the right mix of sweet and heat.

Prior to pouring the rub all over the shoulder, I first layered the shoulder in a little bit of canola oil. This is just to help the rub stick to the meat, and help the flavoring get absorbed into the meat. After doing that, I poured rub everywhere. The beauty of the bone being removed and the shoulder not being tied yet at this point is that I was able to get inside all of the crevices to make sure the rub was applied everywhere. The more, the better.

Rubbed and wrapped shoulder before going into the fridge

After doing that, I wrapped up the rubbed shoulder and put it in the fridge. I used my vacuum wrap, which works very well for this job. But typically I just use some cellophane. Either way works. It was 7pm on Friday night when the rubbed and wrapped pork shoulder went into the fridge. That's it for the Friday preparations.

Saturday morning came time to get the cook started. Given I was using a post-trimmed 7.75lb of meat, I was expecting it to take anywhere from 8-12 hours to cook, as I usually estimate around 1-1.5 hours per pound of meat. Since I wanted the meat to be ready around 7 or 8pm, I decided I wanted to get the meat on the smoker by 8am. (Keep in mind, it's always better to done on the earlier side, when you can just wrap the meat in foil and blankets and put it in a cooler to let it sit for a few hours if necessary).

At 7am, I fired up my Weber Smokey Mountain, using - as usual - the Minion Method. Given this was going to be a long 8-12 hour cook, I went with a nearly full chamber of unlit charcoal in my firestarter, as well as a large ring of unlit charcoal in my chamber.

Next, I removed the shoulder from the fridge.

Pork shoulder removed from fridge and wrap

Pork shoulder tied-up and re-rubbed

Upon removing the shoulder from the fridge, I cut it out of the seal wrap that it was in. You can see from the top picture above that it was somewhat wet and slimy as the oil and time in the fridge had helped the rub to start dissolving into the meat. 

While the picture doesn't show it, as I mentioned earlier in the post, there were flaps of meat going everywhere since the bone was removed. Therefore, this where I tied the whole thing together, just using some simple string. There is no real method to doing it, other than just tying together any pieces that seem too loose, because you want it all to stay together on the smoker. Also, keep in mind, the string has no impact on the cook, and comes off at the end. So it really doesn't matter.

I then added another layer of rub all around the the meat, just to give it some new life prior to heading onto the smoker. The second picture above shows the shoulder tied-up and re-rubbed, ready to get started cooking.

Top-view of the shoulder on the smoker

Side-view of the shoulder on the smoker

I put the meat on the smoker just about exactly at 8am. It was already running a steady 230 degrees, with my intent to keep the smoker's temperature between 225-250 degrees throughout the cook. At the time I put the shoulder on, I also added 4 chunks of apple wood. You want the meat to get the real smoke exposure early on in the cook, because once it's been on there for a while and the internal meat temperature has risen, it stops holding onto the smoke. My shoulder would be finished cooking when the meat hit an internal temperature of around 195-200 degrees.

Over the course of the next few hours, I added 2-3 chunks of wood on two separate occasions, about 1.5 hours apart from each other. I also continually adjusted the vents to make sure the smoker's temp stayed in that 225-250 degrees range. 

After about 3.5 hours on the smoker, the shoulder's internal temperature was about 150 degrees. I stopped adding wood at this point, and started every once in a while spraying the shoulder with an apple juice mixture (simply 3/4 apple juice, 1/4 canola oil). This is just to continue helping the shoulder remain moist.

After about 5 hours on the smoker, 160 degree internal meat temp

I continued to monitor the meat's internal temp, as well as the smoker's temp, for the next few hours, as usual. However, this where this particular cook session and blog post starts to lose its luster. Big pieces of meat typically go through a period called "the stall", usually around 150-160 degrees, where the meat's internal temperature does not budge. This occurs generally because the condensation coming out of meat continually cools the meat off, preventing the temp from raising. If it's really taking too long to break through the stall (it can take 4-5 hours to break through it), you can wrap the meat tightly in foil and put it back on the smoker, to help it push through. I thought I was prepared for this, and planned to not wrap the shoulder, but rather allow it the time to break through on its own.

On this particular cook, I stayed in the 150-160 degree range on my meat's internal temperature for about 4 hours, from 11:30am to 4:00pm. It finally broke through and around 5pm, the temp was close to 170 degrees. However, at this point, it seemed to settle into yet another stall, never going above 175 degrees. I tried increasing the temp in my smoker. I tried wrapping my shoulder in foil (even though I had planned to not do this). And at the end, I tried taking it off the smoker and putting it in the oven at 350 degrees! Despite all of these efforts, the meat's temperature just would not go above 180. 

At 9pm - an hour later than when I wanted to be serving the pulled pork - the temperature was still at 180 degrees. So, I decided to cut bait and pull it off and get it ready to be served.

"Chopped" pork, instead of pulled pork

Because I wasn't able to allow the meat's internal temperature to get closer to my 195 degree target, it really didn't break down enough to be easily pulled. You can see in the picture above two sections of meat. The section on the right is where I still attempted to pull the pork shoulder. It didn't really work, and was more so just chunky shreds. The section on the left is where I didn't even bother trying to pull the pork, and instead just chopped it. This area contained the money muscle, so I had plans to chop it (and not pull it) anyway.

Now, here's the beauty of BBQ. Despite this going so terrible "wrong" in the end, the meat was still really good. And everyone who was over didn't know I had screwed it up at all. But, for the sake of the lesson, it's worth noting what went wrong. And I still don't know! I did ask a few experts including one of the main websites I use, and they all seemed to agree that it must have just been the specific piece of meat that I had. Perhaps if I had all night and just let it keep cooking, it would have eventually broken through the second stall and reached the 195 degree mark. But I just didn't have time for it.

In the end, I served the meat from the above picture with some Hawaiian rolls, cole-slaw, and - sticking with the theme - some Lillie's Q BBQ sauce. I was serving 6 people, and the 7.75 (post-trim) shoulder produced enough meat for more than double that. So I vacuum wrapped some extras, put it in the freezer, and plan to break it out on a rainy day!

I apologize for the limited pictures of the finished product, but I was preoccupied with the issues I was facing, and forgot to keep filming! I'll do better next time.


SMOKING RECIPE CLIFF NOTES:
Pork Shoulder:
- Trim excess fat off both sides of the shoulder
- Cover the shoulder in rub, wrap, and place in the fridge overnight
- Remove from fridge, tie-up and re-rub the shoulder, and then place on the smoker at 225 degrees
- Plan on 1-1.5 hours of cook time per pound of meat
- Add wood at the beginning, and occasionally spray with apple juice later on throughout the cook
- Remove from smoker when meat's internal temp hits 195 degrees
- Let it cool for at least 30 minutes, then chop or pull apart the meat, and serve!


Sunday, February 8, 2015

Smoked Leg of Lamb

SMOKING RECIPE CLIFF NOTES:
Smoked Leg of Lamb:
 - Make the marinade using honey, mustard, chopped rosemary, ground black pepper, lemon zest, and minced garlic
 - Cover the entire boneless leg of lamb with the marinade, put it in a plastic bag and put in the fridge
 - Remove lamb from fridge, add some salt and pepper, and put on the smoker at 225 degrees F
 - Cook until internal meat temp hits 130-140 degrees
 - Pull of smoker, remove the netting, slice, and serve!

Well, it's winter in Chicago, and because of that, I'm not doing much smoking these days. But I did do a leg of lamb about a month ago, and so here it is.

Before I get started with the recipe, I feel it necessary to give another shoutout to the Virtual Weber Bullet website where I got this recipe. This particular leg of lamb recipe included a honey & mustard type of marinade on it, which was delicious. Because this was my first attempt at lamb, I didn't veer of course very much. Next time around, I'll make a few changes.

First, I had to pick up my leg of lamb. While you can choose to go with the bone-in option (and then either cook with the bone in or remove it yourself), I elected to go with the leg of lamb with the bone already removed. I think this is the most common style, and it's certainly the easiest. And as usual, I picked it up from Costco - where I get most of smoking meat.

Leg of lamb from Costco

4.82lbs with the bone removed

Fat-side up

Fat-side down

Two things of note from the above pictures. One - my leg of lamb weighed in at 4.82lbs. From what I have read, that's about normal size with the bone removed. Secondly, you can see in the third and fourth picture that the lamb is wrapped in string. This is because once the bone is removed, the support that kept everything firmly together is removed. Without the string, the lamb wouldn't stay in the "balled up" shape, instead having various flaps in different directions. So with the bone removed, you need the string, and it stays on throughout the cook.

Because this recipe called for the lamb to get covered in a honey mustard marinade, it seemed best to get it set up the day before the smoke. That way, the meat gets some extra time to absorb the marinade and really take in all the flavors. So the first step is to make the marinade.

Fresh rosemary with each part pulled and chopped

Finished marinade

My pictures are limited for this marinade, but I don't think you're really missing anything by not seeing it along the way. All I did was combine in the bowl: 1/4 cup of honey, 2 tbsp of dijon mustard, 2 tbsp chopped rosemary (as shown above), 1 tsp of ground black pepper, 1 tsp of lemon zest, and 1.5 tsp of minced garlic. In the end, it looked like my second picture, and it's ready to go on the lamb.

The next step is to use your hands and rub the marinade all over the lamb.

Lamb with marinade fat-side up

Lamb with marinade fat-side down

Sitting in a plastic bag covered in marinade

There really is no secret skill to covering the lamb with marinade, as far as I can tell. You just get a little dirty and rub it all over, as can be seen above in the first two pictures. The one thing to note is that as previously mentioned, there are gaps and crevices caused by the removal of the bone. So, it's good to really try to get inside of those to apply some of the marinade where you can, even with the netting in the way. Basically, you want the marinade to touch as much of the lamb as possible.

Once you have applied the marinade, then put the lamb into a plastic bag and pour whatever marinade (if any) may be left into the bag as well. Let all the air out, seal it up, and put it in the fridge. There's no rule about how long it needs to sit in the fridge or how much time you need to do this prior to putting it on the smoker. But the more, the better, probably up to about 24 hours. For me, it went in the fridge on Friday around 5pm and I ended up putting it on the smoker around Saturday at 4pm, so just about 23 hours.

Now the lamb is only going to be on the smoker for around 2 hours, unlike a brisket, pork shoulder, or even ribs, which all require 4+ hours. So given I wanted to eat around 7pm, I decided to put it on around 4pm that day (to give myself a little flexibility). 

The lamb after being removed from the fridge/plastic bag

Covered with some salt and pepper and ready to go on the smoker


Just prior to pulling the lamb out of the fridge, I got my smoker set up using the minion method, as discussed in a previous post. Because this was not going to be a very long cook, I didn't use as much charcoal in the chamber or in the chimney. As is often the case with my BBQ, I aimed for the temperature inside the smoker to be around 225 degrees F. 

Once it steadied out around this temp, I moved forward with pulling the lamb out of the fridge. I then sprinkled some salt and pepper all over the lamb. I didn't want to use anything beyond salt and pepper to go with it here, as the marinade flavor was meant to be the overwhelming flavor, and I felt that any rub or other flavorful spices would take away from that. The two pictures above show the lamb covered in both the marinade and the salt and pepper, ready to go on the smoker!

Leg of lamb on the smoker!

Nearly finished product

I situated the lamb on the top rack of my smoker, with the water pan filled up below it to help maintain the 225 degree temperature. I used the usual two temperature gauge attack, with one thermometer measuring the smoker's temperature, and the other measuring the meat's internal temperature. 

My target for the lamb being finished cooking was a temperature of around 130-140 degrees. Similar to a steak, lamb can be prepared with varying degrees of "doneness", and so I was really aiming for just over 130 degrees so it would be a medium-rare finish. I was expecting the meat to take 1.5-2 hours to finish cooking. However, for whatever reason, this one took a little over 2.5 hours. The second picture above is right before I took it off the smoker. I used a new Christmas present from my wife's parents - the Splash-Proof Super-Fast Thermapen thermometer - to measure the lamb's internal temperature in a few different spots. For BBQ geeks, it is THE instant read thermometer to have - a very cool gift. Anyway, on average, the lamb was around 133 degrees when I pulled it off the smoker.

Finished leg of lamb with the net still on

Carving up the leg of lamb once the netting is removed

Close-up of the carving

Medium-rare slices of leg of lamb!

After pulling the lamb off the smoker, I let it sit for about 10 minutes just to finish cooking and cool down a bit. I then used a knife to cut off the netting. After removing that, I started slicing, simply as you can see above. As you can somewhat see from these pictures, the lamb was a perfect medium-rare.

I also made up a little mint chimichurri sauce to go with it, but I ended up not really using it because the flavoring of the lamb with the honey mustard marinade was so good, I didn't want to cover it up at all. When we finished eating, my wife told me she already knows she wants me to make this again for our Easter dinner - only 3 months away! Until next time..


SMOKING RECIPE CLIFF NOTES:
Smoked Leg of Lamb:
 - Make the marinade using honey, mustard, chopped rosemary, ground black pepper, lemon zest, and minced garlic
 - Cover the entire boneless leg of lamb with the marinade, put it in a plastic bag and put in the fridge
 - Remove lamb from fridge, add some salt and pepper, and put on the smoker at 225 degrees F
 - Cook until internal meat temp hits 130-140 degrees
 - Pull of smoker, remove the netting, slice, and serve!